
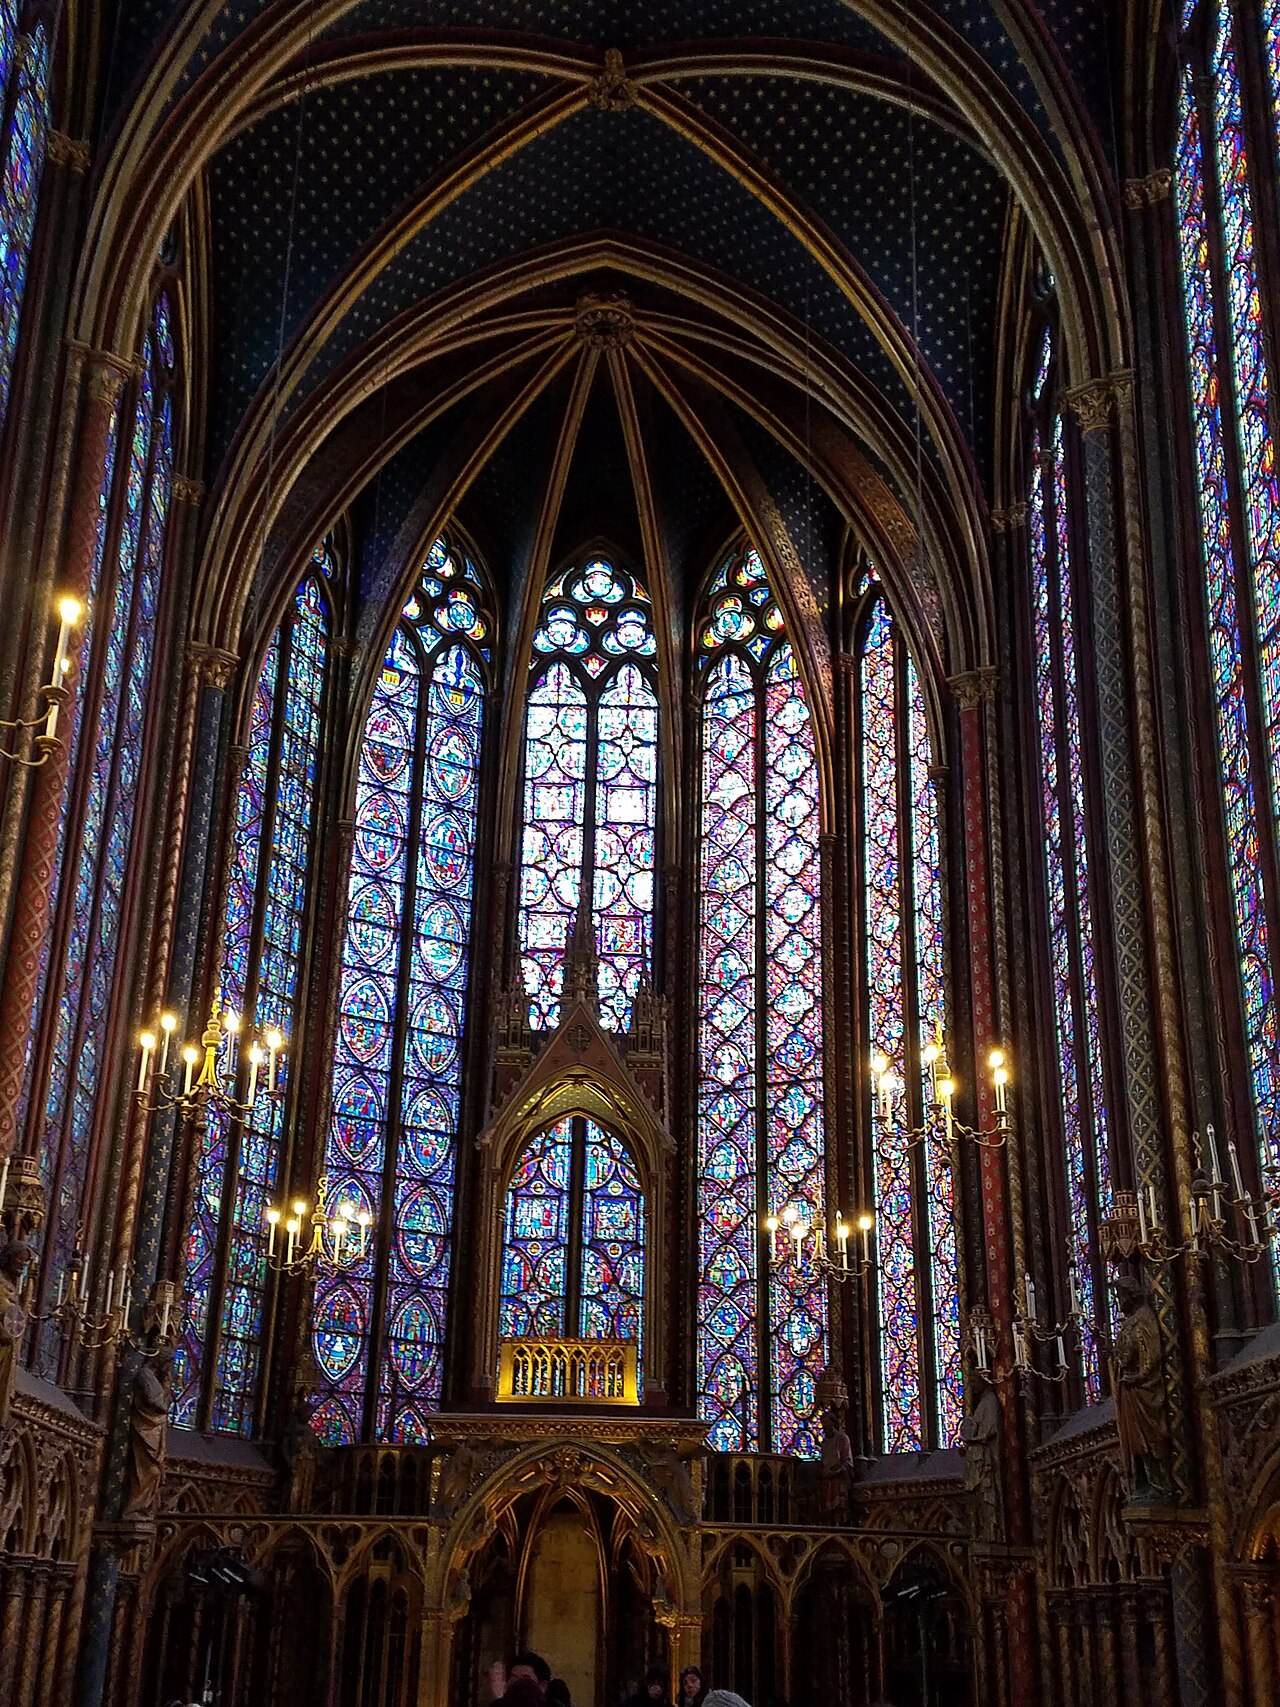
Light through a tall window casts red and blue patterns onto the floor. Faces and folds of clothing appear in the glass, crossed by a network of dark lines. Was the whole picture painted onto glass, or assembled like a puzzle of colored pieces?
Traditional stained glass can combine both methods. Separating color within the glass, imagery fired onto its surface, and metal joining strips makes the construction easier to read. Among the many modern techniques, this article focuses on traditional panels assembled with lead cames.[5][7]
Sydney Decoto · CC BY-SA 4.0 · Wikimedia Commons
First, make glass that already has color
Pot-metal glass is colored by adding metallic oxides or other colorants while the glass is molten. That is a different starting point from painting a finished clear sheet.[1] The Corning Museum of Glass lists cobalt for blue and copper for blue-green or ruby colors. Copper alone can produce different results, so a metal’s name should not be treated as a fixed, one-to-one color recipe.[10]
The eyes and nose of a face do not automatically appear within a colored piece. Glass color supplies broad areas of the picture; describing fine details remains a separate task.
Nor is every sheet the same color all the way through. Flashed glass combines a base glass with a thin colored glass layer. The V&A describes historical examples in which a thin red layer allowed light through an otherwise intensely colored material. Modern maker Lamberts also describes combining base and colored layers to create streaks or color variation. These are glass layers, distinct from the surface paint discussed below.[1][8]
Plan the boundaries before assembling the picture
A design establishes the shapes and positions of the pieces. A full-size working drawing guides cutting and placement. The V&A’s making account distinguishes the drawing, cutting, surface decoration and leading as separate stages.[2][7]
The illustration below is a window design on paper, not a finished glass window. Thinking about such designs alongside completed works reveals that brushwork alone does not determine the picture. Boundaries between colored areas and divisions between pieces are also part of the composition. This particular drawing should not, however, be assumed to be the full-size template actually used for cutting.

Elihu Vedder · Public domain · Wikimedia Commons
Faces and folds can be painted and fired
Vitreous paint can supply eyebrows, hair and folds of clothing. The Getty Museum describes paint containing glass particles mixed with a liquid medium and fired to bond it to the surface. Dark lines describe contours, while stippling or scratching the paint layer can control lighter passages.[3]
Not every dark line in a window is therefore a lead came. Look separately at broad boundaries following the edges of pieces and fine lines drawn within one piece. In the male-head panel below, you can distinguish facial and hair details from the divisions around neighboring pieces. This does not mean that a photograph can identify the exact composition of the paint.

Daderot · Public domain · Wikimedia Commons
Silver can produce yellow rather than a metallic sheen
Silver stain is another way of adding color at the surface. Applying silver compounds and then firing the glass can produce yellow, yellow-brown or amber tones. It is not a method of attaching shiny silver foil.[4][7]
The technique allows yellow to be added to part of a single piece. The Getty describes roundels combining vitreous paint and silver stain on one sheet of clear glass.[3] A change in color therefore need not mark a change of glass piece. Conversely, a yellow area alone does not prove that silver stain was used.
A useful way to read a window is to ask whether a boundary between colors is also a boundary between pieces, rather than simply naming the colors.
Lead lines belong to both the picture and its construction
The metal strips that join glass pieces are called cames. In leaded glazing, lead refers to this joining metal. It does not mean the same thing as lead crystal, where lead is an ingredient of the glass itself.[5]
A common came profile resembles an H. The edges of neighboring pieces fit into channels on either side: the central web divides them, while the flanges embrace their edges. Lead is readily shaped to follow curves. U-shaped members may be used around the outside edge.[6]

Victuallers · CC BY-SA 3.0 · Wikimedia Commons
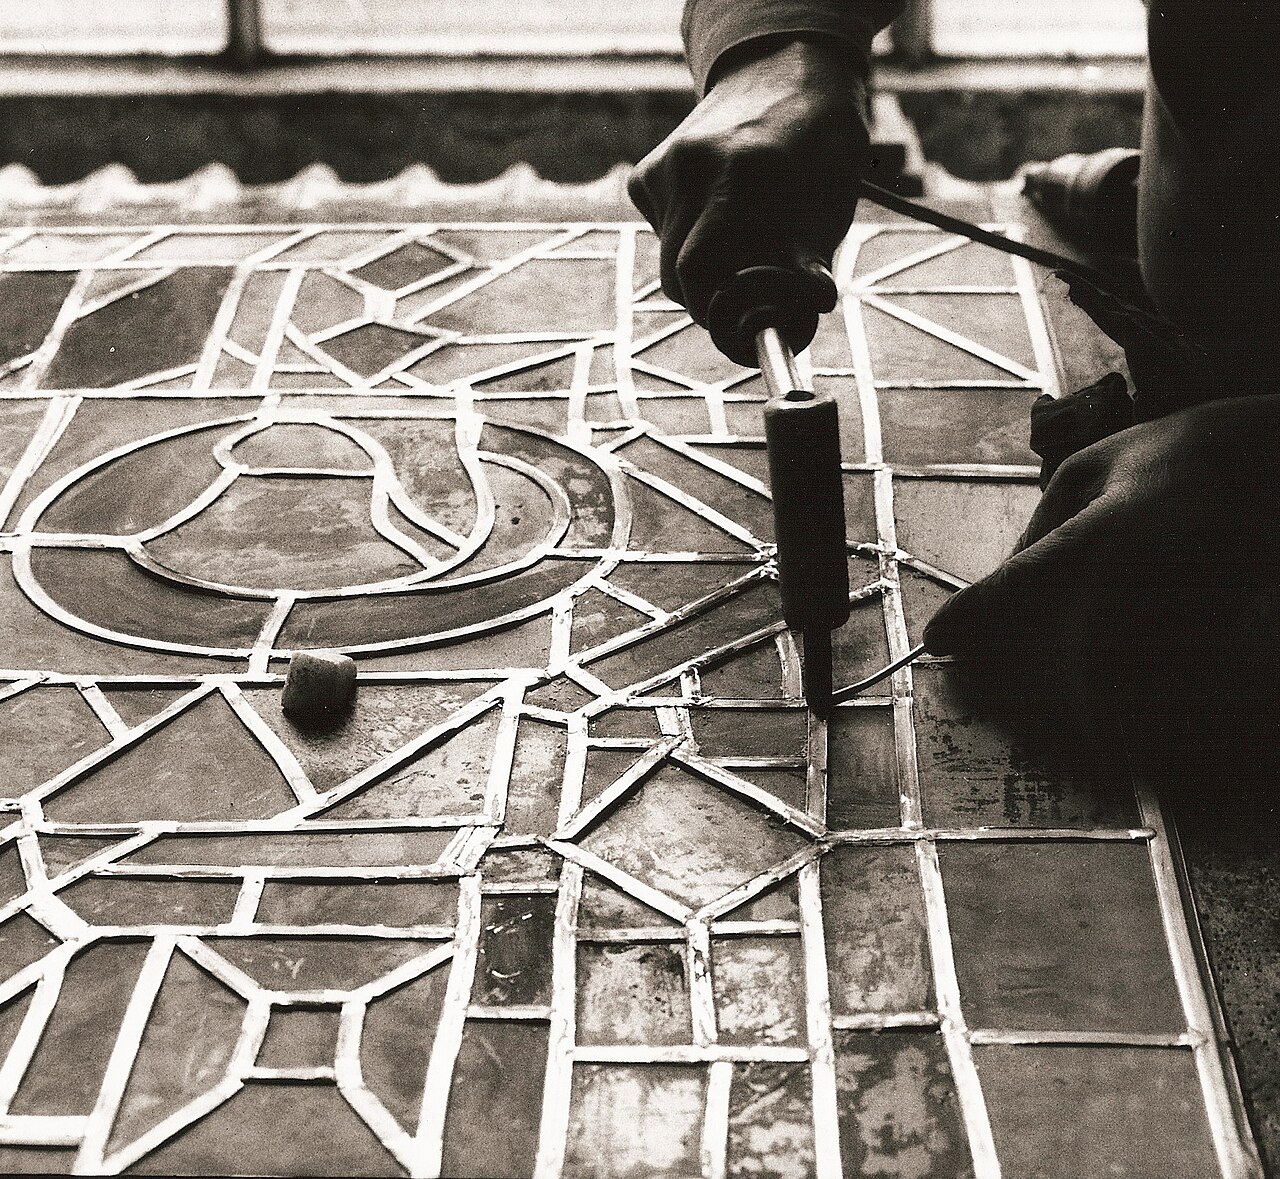
Once the glass and cames are arranged to the design, the metal intersections are soldered. The glass pieces are not melted into one sheet. In the workshop photograph below, the iron meets a metal junction. This is a different panel from the preceding assembly example.[6]
Hans Bernhard ( Schnobby ) · CC BY-SA 3.0 · Wikimedia Commons
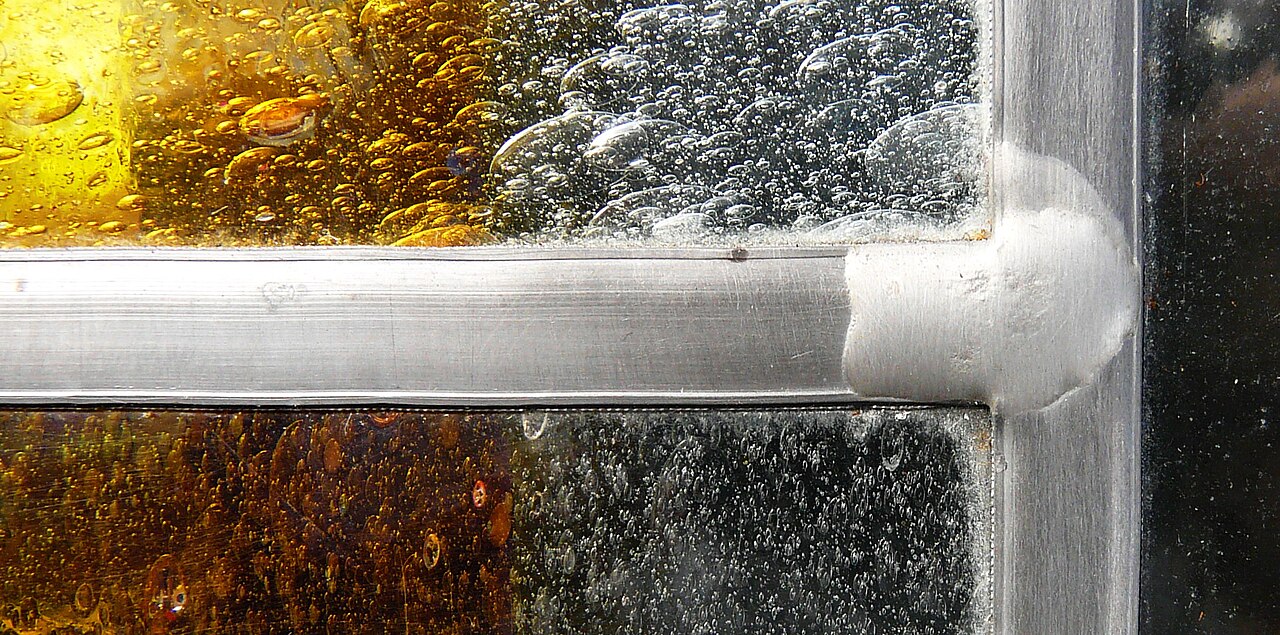
A close look at a finished junction shows solder bridging the meeting strips. Putty is also worked between glass and came to finish the panel.[1] Lines dividing the picture are thus physical components that join its pieces. The outlines contribute to the composition as well as to the assembly.
Hans Bernhard ( Schnobby ) · CC BY-SA 3.0 · Wikimedia Commons
A large window does not rely on lead alone
Soft lead holding individual pieces does not mean that it supports an entire large window unaided. U.S. National Park Service guidance considers came material and profile, soldering, pattern, framing and reinforcement together. A panel’s strength depends on their combination.[6]
The Canterbury Cathedral detail below was photographed with flash. The metal between pieces and a horizontal support stand out more clearly than the luminous colors. A window reveals different information when viewed as a picture in transmitted light and as an assembled object.

Photo: TTaylor (2005); historic artwork artist unknown · Public domain · Wikimedia Commons
Next time, look for color areas, fine lines and joining strips
The Metropolitan Museum of Art lists pot-metal glass, vitreous paint and lead together as the materials of a foliate border section from Saint-Denis.[9] These categories describe materials that coexist in actual works.
Next time you encounter stained glass, start with the broad color areas from a distance. Then find the finer lines in faces or clothing. Finally, ask which lines follow the edges of individual pieces. Appearance alone cannot establish every technique, but it gives you useful questions to compare with an object’s materials label.
A beautiful surviving window is not immune to damage. Damage to the glass itself, loss of surface paint and deterioration of the metal assembly are separate problems.[6] A single window brings together the skills of making color, drawing images and supporting pieces. Following the beauty revealed by light also reveals the care embodied in its materials and design.
References
- Victoria and Albert Museum — Stained glass: an introduction
- Victoria and Albert Museum — How was it made? Stained glass
- J. Paul Getty Museum — Images in Light: Newly Acquired Stained Glass
- Corning Museum of Glass — Staining
- Corning Museum of Glass — Leaded glass
- U.S. National Park Service — Preservation Brief 33: The Preservation and Repair of Historic Stained and Leaded Glass
- Stained Glass Association of America — Stained Glass Dictionary
- Glashütte Lamberts — Streaky glass
- The Metropolitan Museum of Art — Foliate Border Section
- Corning Museum of Glass — Frequently Asked Questions